Mount SD card in VirtualBox from Mac OS X Host
Somehow I forgot the password to one of my Raspberry Pi boxes and needed to reset it. The only way I know how to do this is to mount the root partition from the context of another machine and then edit the /etc/shadow file. Since I own a MacBook Air and it can’t read ext3 natively (not that I know of at least) I thought I would just just spin up a virtual machine in VirtualBox, mount the SD card from the Raspberry Pi, make the change and be done. It wasn’t as easy as I thought because, for some reason, getting VirtualBox to pass the SD card reader to a virtual machine as a virtual device is not quite easy. Below are the steps I had to take to get it working.
First, insert the SD card into the reader, open a terminal window and type mount.

Take note of the SD card device that shows up. In my case, it was /dev/disk1s1 (NO NAME matches the title that showed up in Finder when I inserted the card so this is a hint as to which one is the one I am looking for) listed at the bottom of the mount command. You don’t want to get this wrong so make sure it’s right! For a sanity check you could always run mount before inserting the card and then after, to see the difference.
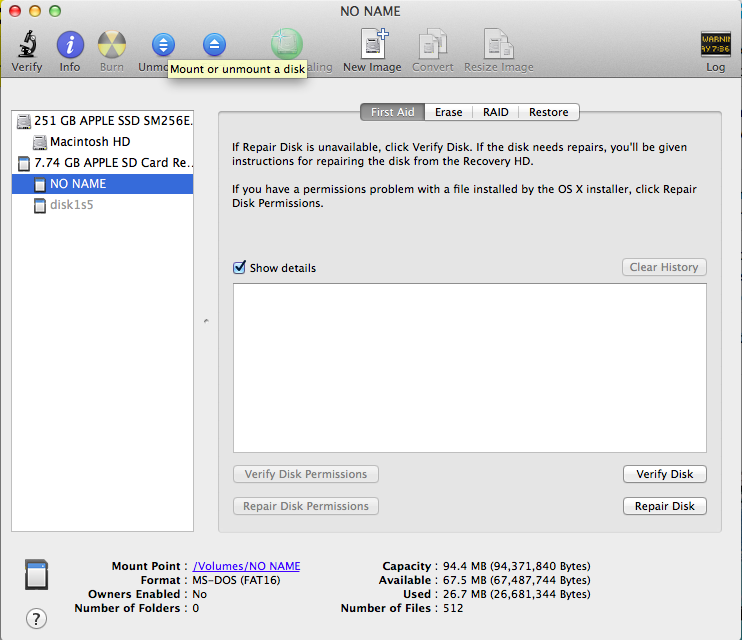
Next, open up Disk Utility, click on the the mounted partition from the card (NO NAME in my case), and then click the Unmount button at the top. Do not click the eject button, just the Unmount button.

Now, you need to create a VirtualBox vmdk file that points to the SD card so that you can mount it as a device in a virtual machine. You need to run sudo VBoxManage internalcommands createrawvmdk -filename ./sd-card.vmdk -rawdisk /dev/disk1. Note, when I ran the mount command above, my device name was /dev/disk1s1 but in this command I did not include the trailing s1 portion. The reason for this is that the s1 portion of the device name denotes a partition but I want to create a pointer to the entire device (mine has 2 partitions). So, just take the first portion of your device name and use it for the -rawdisk parameter.
Now that you have a vmdk file pointing to your raw SD card device, you need to set permisisons on the vmdk file and /dev/disk1 device. Run sudo chmod 777 /dev/disk1 and sudo chmod 777 ./sd-card.vmdk. This will ensure you are able to access and mount the vmdk file in VirtualBox.
The last step, is to add a SATA device in the virtual machine Storage configuration. Click “Add Hard Drive” on the SATA controller.
You will be given the option to “Choose existing disk”. Choose this option and then select the vmdk file you created earlier.
Now, all you need to do is start your virtual machine with VirtualBox and your SD card should be accessible from your virtual machine. If you get an error about the device being busy when trying to start the machine, open the Disk Utility and ensure all partitions of the SD card are still **Unmounted. **For some reason I had to do this because OS X remounted my card somewhere along the way.
If you’re lucky like me, SD partitions will automatically be mounted. In my case, I was running Linux Mint and both partitions of my SD card were mounted automatically!